
Lighting Setup for VR Cam Girls: 3 Looks That Always Work


Lighting Setup Fundamentals for VR Cam Girls
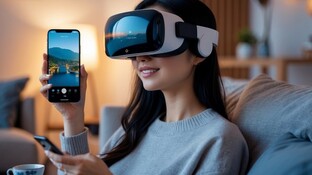
Let’s be honest, good Vr Cam Lighting makes a massive difference in how we appear in VR. Clear, consistent lighting keeps us looking natural and helps our webcams capture all those little details that matter.
It’s not just about looking good, though. The right setup actually reduces harsh shadows, balances skin tone, and makes the image pop for viewers.
Lighting shapes how our audience sees us in these virtual spaces. If it’s uneven or too dim, webcams just can’t keep up and everything gets grainy or flat.
Bright, balanced Vr Cam Lighting keeps depth and stops distortion, especially when the VR system is tracking movement. That’s a huge deal for immersion.
Poor lighting can mess with body tracking and green screen effects, too. When brightness stays consistent, the camera and software can separate us from the background way more cleanly.
That makes the whole virtual environment look a lot more believable, right? It’s wild how much difference that makes.We’re usually aiming for diffused lighting, think softboxes, ring lights, or LED panels with adjustable settings. These tools cut down glare and let us match the vibe of whatever virtual space we’re in.
Why the Right Light Source Matters for VR
Picking a light source depends on our space, budget, and the camera we’re using. LEDs are pretty much the go-to: efficient, cool, and easy to control.
They let us adjust both brightness and color temp, which is super handy if we’re switching from a daytime scene to something moodier at night.
Natural light can look great, but it’s unpredictable. For steady results, artificial lights win every time. Most pros use a three-point lighting setup, key, fill, and backlight. It’s classic for a reason.
This keeps things defined without those harsh contrasts that just don’t look good.
Webcam Placement and Vr Cam Lighting
Camera placement is half the battle. We want webcams at eye level or a smidge above for the most natural angle.
If the lights are too close or too far, that’s when you get glare or weird exposure. It’s a balancing act.
With multiple webcams, each needs the same lighting. If one angle’s darker, it just kills immersion and distracts viewers. Try recording short clips and check how your skin and background look. Adjustable mounts and tripods help a ton for dialing in the perfect combo.
Seriously, don’t be afraid to tweak things until it just feels right.
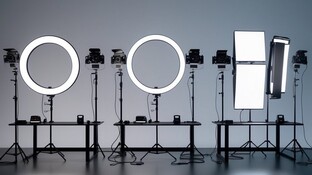
Essential Equipment for Flawless Vr Cam Lighting
Having the right lighting tools is honestly a game changer for any VR cam setup. It lets us control mood, color, and depth, plus it keeps things looking sharp and professional on camera.
Balanced brightness, soft shadows, and natural skin tones are the goal. But what’s the best way to get there?
Finding a Great Ring Light
A solid ring light gives direct, even illumination that really flatters the face. It’s perfect for close-ups and helps keep eye contact with the lens.
Look for adjustable brightness and color temp. That way, you can tweak things to match your room or your skin tone. A 14–18 inch ring light usually covers enough space without washing out the background.
Models with bi-color LEDs are awesome for switching between warm and cool. Mounting the ring around your webcam or VR cam keeps the light centered and flattering.
A dimmable panel or remote lets you adjust on the fly if you need to, which is way more convenient than you’d think. By the way, here are a couple of helpful resources if you’re new to this stuff: VR Live Chat Rooms and What’s It All About?
LED Panels and Softboxes for Vr Cam Lighting
LED panels and softboxes are a must for full-body VR streams. LEDs are compact, energy-efficient, and stay cool even during marathon sessions.
Angle them to fill in shadows or highlight specific spots in your room. Softboxes give you that soft, diffused daylight vibe that just looks good on everyone.
If you pair softboxes with LED panels, you’ll soften edges and avoid glare on shiny VR gear. Here’s a typical setup:
This combo keeps everything balanced, so movement and facial features stay clear and lively.
Budget-Friendly Lighting Alternatives
Starting out or just want to upgrade slowly? There are plenty of affordable lighting options that still look pro.
Clip-on ring lights, USB-powered LED panels, and adjustable desk lamps can get you surprisingly far with Vr Cam Lighting. White foam boards or reflective panels bounce light and smooth out shadows. Try adding RGB light strips in the background for a little extra color and depth. It’s all about positioning and diffusion, even basic lights can look great if you soften them with sheer fabric or parchment paper.
Three-Point Vr Cam Lighting Setup: The Standard
Three-point lighting is the classic: key, fill, and back light. Each one shapes depth, reduces shadows, and keeps you looking clear and natural on camera.
When it’s balanced, this setup just works, doesn’t matter if you’re streaming or in VR.
Dialing in Your Key Light
The key light is your main source. It defines your shape and sets the overall vibe for the scene.
Usually, it sits about 45 degrees to one side and just above eye level. That way, you get flattering highlights without harsh shadows. For VR camming, you want bright but not blinding. Adjustable LED panels are the best bet. Toss a diffuser or softbox on there to spread the light and avoid shiny skin or glare on your headset.
Test shadow intensity, if one side of your face is too dark, tweak the brightness or move the light closer until things look even but still have some dimension.
Fill Light Tips for Balanced Vr Cam Lighting
Fill lights soften those shadows from your key. Place it on the opposite side at a lower brightness, around a 45-degree angle too. You’re not trying to erase shadows, just take the edge off. Start with half the intensity of your key light and adjust from there. Sometimes bouncing the fill off a white wall or using a reflector panel gives a softer, more natural look. Keep the color temps matched, mixing warm and cool lights can make skin tones look weird in VR.
Back Light for Depth and Pop
The back light (or rim/hair light) separates you from the background. Stick it behind and above, aimed at your hair or shoulders. This adds a subtle glow around your edges so you don’t blend into the scene. Keep it dimmer than your key, but bright enough to outline. Small LED spotlights work well here. Adjust the angle to highlight hair or shoulders without causing flares or weird hot spots.
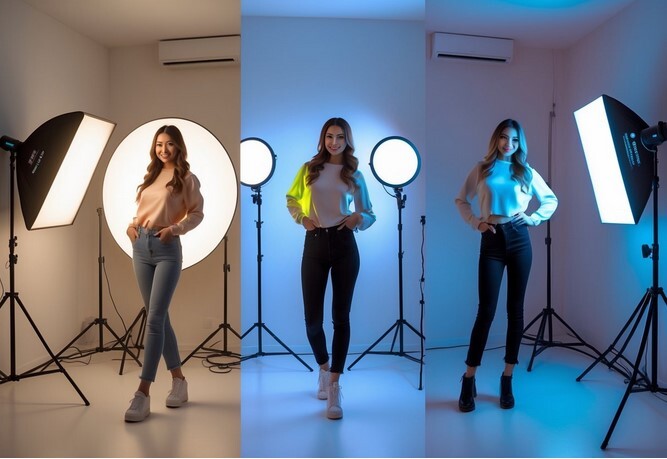
3 Reliable Vr Cam Lighting Looks That Work
You don’t need fancy gear to get solid lighting. Here are a few setups that always seem to work for VR camming, whether you want soft glam, drama, or a natural look.
Soft Glam: Flattering and Natural
For that soft, flattering vibe, use a three-point setup. Place a gentle key light just above and to the side, then a fill on the other side to knock back shadows.
Add a low backlight for separation. Warm sources (around 3000K–3500K) give a healthy glow. Diffusers or softboxes smooth out harsh edges and make skin look even.
This is great for close-up VR shots where facial detail matters. Keep brightness moderate to avoid overexposure, ring lights are handy in tight spaces, but panels give you more control.
Bold and Dramatic: High-Contrast for Themes
For themed or stylized VR streams, go bold. Use a single strong key light from one side to create deep shadows and drama.
Colored gels or RGB lights can match the mood, red for passion, blue for mystery, whatever fits. Lower the ambient light so highlights pop.
Backlights or rim lights outline your body or hair for extra separation. Play with light ratios, maybe keep the key three times brighter than the fill for extra punch.
Natural Daylight: Everyday Realness
Want a relaxed, real-life feel? Mimic daylight. Place lights near eye level and use cool whites (4000K–5000K) to match window light. If you’ve got sunlight, face it and use a reflector to soften shadows. Pair a main soft light with a weaker fill to balance the scene. Don’t mix warm and cool sources or your colors will get funky. LED panels or ring lights can fake daylight even in darker rooms. The goal is even, neutral light that keeps skin tones true.
Advanced Vr Cam Lighting Techniques and Customization
Once you’ve got the basics, it’s all about tweaking. Try changing how your light spreads or how colors interact with your setup. Little adjustments, like moving a lamp or swapping a bulb, can totally change how natural and pro your VR cam scene feels. Sometimes you just have to experiment until it clicks, right?
Using Diffusers and Reflectors for Vr Cam Lighting
Diffusers are a lifesaver when it comes to softening harsh light and dialing down those pesky shadows on skin or backgrounds. Pop a softbox, umbrella, or even a quick diffusion panel in front of your main light, and suddenly everything looks smoother, especially if you’re moving around in a VR environment.
Reflectors, on the other hand, bounce light right back onto those darker spots that just won’t cooperate. A white or silver reflector adds a bit of pop, while gold ones tend to give skin a warmer, more flattering vibe.
Honestly, using both diffusers and reflectors is where you get real control over contrast and depth. It’s a bit of trial and error, moving the reflector just a little can make a huge difference in how those shadows fall.
If space is tight, foldable reflectors or clip-on diffusers are a total win. They don’t take up much room but still let you tweak the Vr Cam Lighting without cluttering your setup.
Color Temperature and Mood Lighting in Vr Cam Lighting
Color temperature can totally change how your scene feels. If you want a natural look, daylight-balanced lights (around 5600K) are the way to go, Warmer tones, say 3000–4000K, make things feel cozy and intimate, while cooler tones (above 6000K) are more modern and crisp. Mixing different color temps? Not a great idea. It can make skin tones weird or throw off the whole mood. Stick to one temperature or use adjustable LED panels, which are a lifesaver for keeping Vr Cam Lighting consistent. Check out this guide for more on matching your lights.
Little touches, like accent lighting, think colored LED strips behind you, can add depth and make the whole VR experience feel more immersive. Just don’t let them overpower your main lighting, or you’ll lose that balance.
Troubleshooting Vr Cam Lighting Issues
Let’s be real: uneven exposure, glare, and flicker happen to everyone. If you’re dealing with overexposure, try dialing back the brightness or moving your light source further away.
Harsh shadows? That’s usually a sign you need a diffuser or maybe a secondary fill light. Flickering is the worst, it’s often caused by mismatched power frequencies or cheap bulbs. Go for LED lights rated for video and match your camera’s frame rate to the power frequency (either 50Hz or 60Hz) to avoid headaches.
If your skin tones look off, double-check both white balance and color temp. A quick test shot before you go live can save you a lot of grief and help keep your Vr Cam Lighting looking sharp.
Optimizing Your Space for Reliable Vr Cam Lighting
Getting consistent lighting is about more than just your equipment. It’s about how that light interacts with your space and what’s in it. Controlling shadows, dialing down glare, and keeping your setup steady across sessions is key. You can find more tips in this lighting setup guide.
Minimizing Shadows and Glare with Vr Cam Lighting
Start by angling your light sources so they don’t throw harsh shadows across your face or body. The classic three-point lighting setup, key, fill, and back light, works wonders for Vr Cam Lighting. The key light should be just above eye level, angled down at about 45°. Fill light softens up the shadows, while the back light helps you pop from the background. Watch out for glossy surfaces or mirrors; they can bounce light in weird ways and mess with your camera’s exposure. Diffusers, softboxes, or frosted LED panels help here.
Matte finishes on walls or props are your friends if you want to keep glare at bay. If you still get hot spots, try lowering your light intensity instead of moving your camera. Keeping your light temperature between 3,200K and 5,600K is a safe bet for most skin tones and outfits.
Background and Set Considerations for Vr Cam Lighting
Your background can make or break your lighting. Light or shiny walls bounce light all over, while dark ones just swallow it up. Neutral matte tones are usually the sweet spot, they reflect light softly and keep things balanced.
Keep your set tidy. Clutter, like tall furniture or cables, can throw weird shadows. If you use props or decorations, highlight them with separate accent lights or LED strips so nothing looks out of place.
Green screens need their own lighting setup, use two soft lights at 45° angles to the backdrop to avoid shadows and get an even tone. Leave about a meter between you and the background to avoid color spill and get cleaner edges for keying.Maintaining Lighting Consistency Across Sessions
Getting Vr Cam Lighting right is trickier than it sounds, especially if you want every session to look just as crisp as the last. We jot down our lighting setup so we can piece it back together next time without second-guessing.
A quick table helps us keep tabs on bulb brightness, color temperature, and where each light actually sits in the room:
We slap down a bit of tape to mark tripod and light stand spots on the floor. That way, even after shuffling things around, our lighting angles don’t go haywire.
It’s honestly worth the extra minute to check bulb output and battery levels before hitting record. Flickering or dimming lights can ruin a session before it even starts.
We also make sure the camera’s white balance lines up with the lighting temperature. That’s how we avoid weird skin tones that look off on Chatterbate or anywhere else.
For more technical lighting tips, you might want to check out this guide from B&H.
Consistency isn’t just about looking good, it’s about not distracting your audience with distracting changes. If you’re aiming for that polished, pro vibe, these small steps really do add up.


You must be logged in to post wall comments. Please Login or Signup (free).